It is well known that temporary pacing requires an electrode lead to be implanted non-permanently in the patient's body. So how should it be implanted? It is mainly divided into the following steps:
1. Surgical instruments preparation
2. Routine preoperative preparation
3. Venous puncture
4. Placement of the pacing electrode catheter
5. Connection of the electrode catheter to the pacemaker
6. Pacing threshold testing
7. Secure fixation of the electrode catheter
First, the preparation of surgical instruments. The procedure requires a standard electrocardiograph (ECG) machine, a monitor, an 8301 cardiac temporary pacemaker, an 18-gauge regular puncture needle, and either a 6F or 7F arterial sheath, as well as 5F floating electrode catheter.
Next, the routine preparations before surgery. For example, necessary local anesthesia, emergency medications, defibrillators, and sterilised kits (e.g., venous incision kit, etc.)
Next comes the venipuncture step. First, it is essential to select a suitable vein, which can be either the subclavian vein or the internal jugular vein. Let's take subclavian vein puncture as an example, the puncture point is at the midpoint of the clavicle or the outer 1/3 of the clavicle, about 1to 2 cm below.
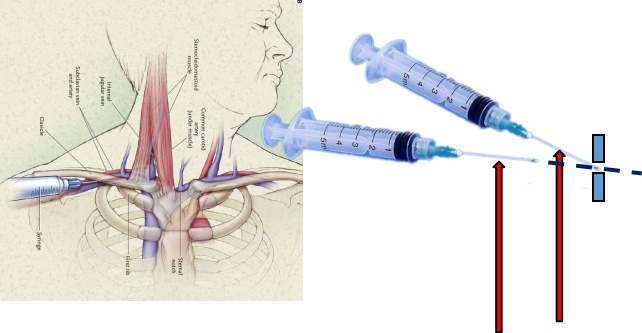
How can we determine if the puncture is correct? Typically, it should be assessed based on the blood colour and blood pressure. If you are unsure of the outcome, do not insert the sheath, and instead, reattempt the puncture! In the case that the sheath enters the artery, remain calm and do not hastily remove the sheath without proper evaluation.
After the puncture is completed, it is time to place the electrode catheter. When using a balloon-floating catheter, the balloon is inflated in the vena cava or right atrium. The catheter can be advanced in the direction of blood flow through the tricuspid valve into the right ventricle. The catheter needs to be rotated into the right ventricle and pushed into a solid part of the ventricle before deflating the balloon.
Next, the connection of the electrode catheter and pacemaker. The temporary pacing electrode is connected to the 8301 patient cable as shown.
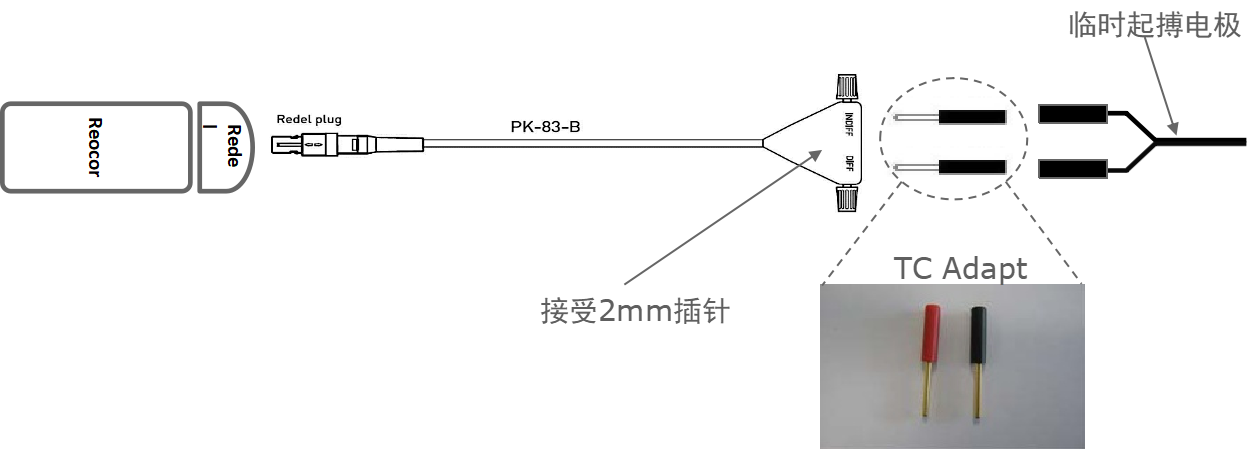
After the connection is established, you should immediately use the 8301 temporary pacemaker to test the pacing threshold and observe the ECG.
Finally, all you need to do is secure the pacing electrode catheter. Once the electrode catheter is properly positioned, it should be sutured and secured to the skin at the puncture site along with the sheath. Avoid moving the pacing electrode position during the suturing process in order to prevent electrode dislocation. After sterilisation with alcohol, the area should be covered with sterile gauze dressing. With that, the temporary pacemaker implantation is complete.


 互联网药品信息服务资格证书 (粤) -非经营性-2021-0041